


Adding custom fonts to your website is a fantastic way to add personality and branding to your website. While Showit and most website builders come with a solid library of Google Fonts, you might want to use a font that’s more distinctive and less commonly used, or one that’s not available natively in Showit, whether it’s a luxury serif, a playful script, or a clean modern sans-serif that perfectly matches your brand.
In this blog post, you’ll learn exactly how to add custom fonts to your Showit website, plus important web typography tips & best practices. Let’s get started!
This post contains affiliate links, which means I gain a commission at no cost to you if you decide to make a purchase through these links.
Step 1: Choose & Download Your Font
Choose the custom font you want to use for your website and download the files available for the font. You can find custom fonts in a lot of places on the internet, like Creative Market, Fontshare, DaFont, and individual font sellers. Be sure to get a commercial use Webfont license for fonts you purchase for use on your website.
When it comes to custom fonts, they are better used for title text/headings and accents, basically for short strips of text you want to stand out. It’s not a good idea to use custom fonts as your paragraph text font. For your paragraph text font, you’ll want to stick to a readable traditional font or a Google font, such as Open Sans, Arial, Dm Sans, Montserrat etc.
Having too many custom fonts on your website can negatively impact your page speed so it’s best to use custom fonts for only your titles and accents, and have your paragraph font be one available through your web builder’s font library.
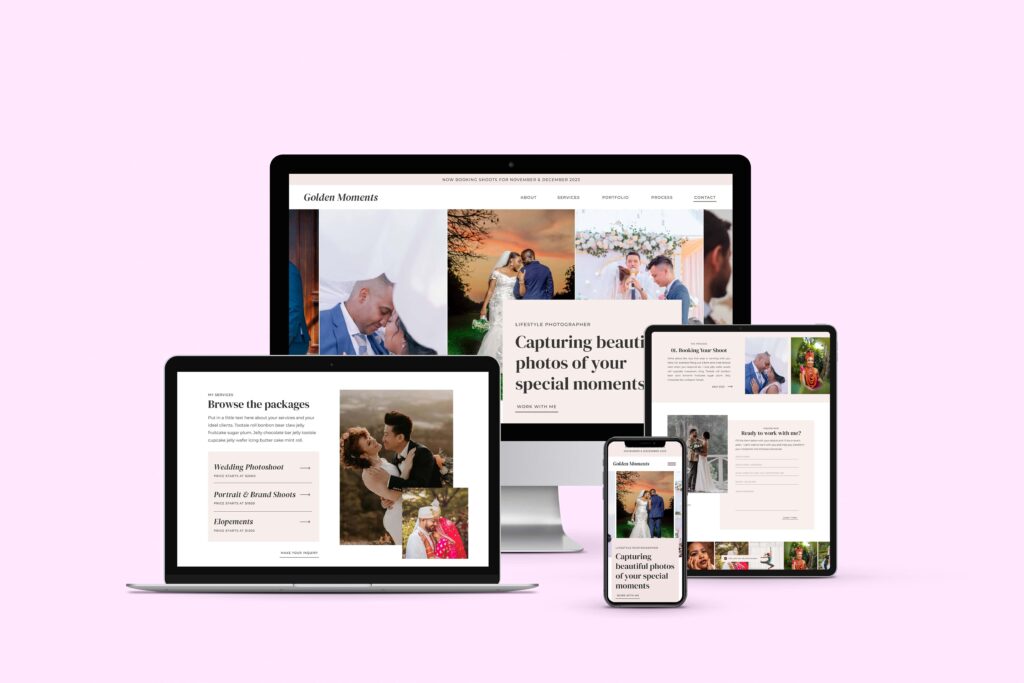
Stylish & Strategic Showit Templates
Skip the DIY stress. Start with these Showit templates that are beautifully designed, easy to customise, and built to convert. From website templates to sales pages, opt-in page templates and more.
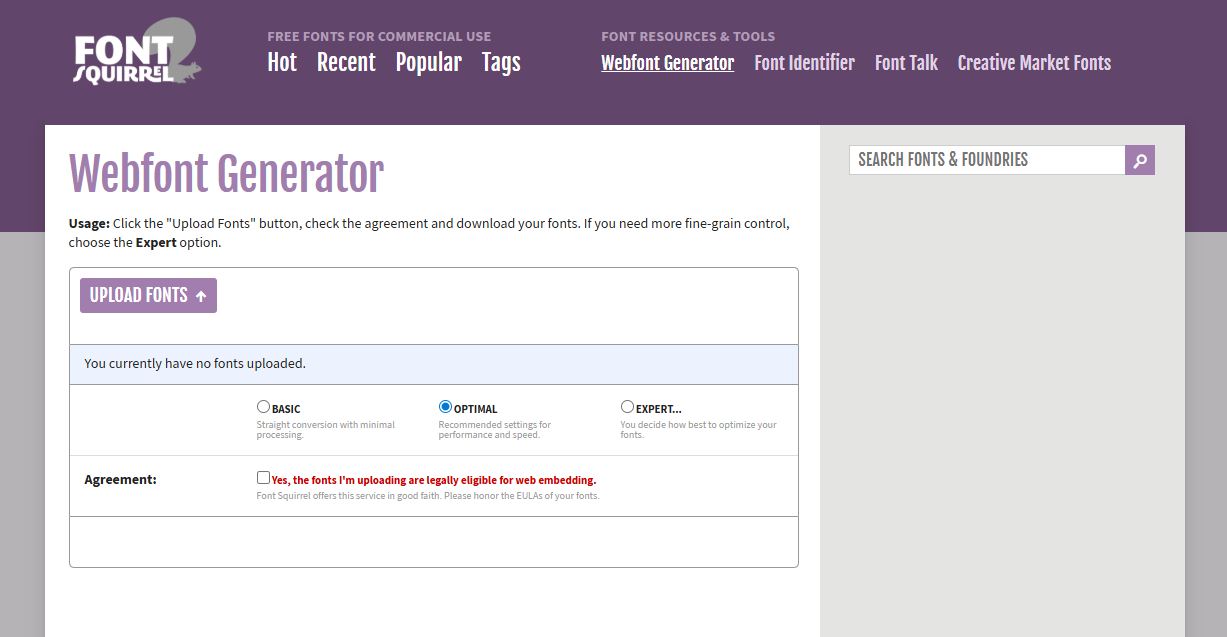
Step 2: Convert the font to a web-safe file
Some font files you download would be in .otf (OpenType Font) or .ttf (TrueType Font) format. This format is not the best to use for websites, so you’d need to convert it to Web Open Font Format (.WOFF) in order to use it on your Showit website.
You can do this easily using an online font converter like FontSquirrel or Convertio to convert your font files to .woff. All you need to do is upload your font files from your device to the converter, and then download the converted files. Skip this step if the font you downloaded or purchased came with a .woff file included.
🌟 Step 3: Upload the .woff file to your Showit website
Now that you have the proper font file format, it’s time to upload the font to your Showit dashboard.
- Go to Design Settings (on the left side in your Showit dashboard)
- Go to the Fonts tab in Design Settings
- Click on “upload font file” under Custom Fonts
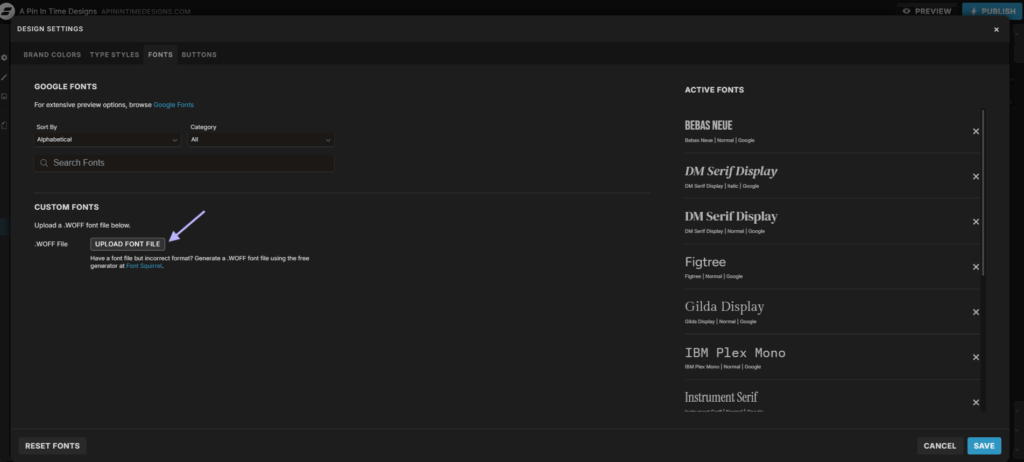
- This opens up your media library. Upload the .woff font file to the media library.
- Go back to the fonts tab in Design Settings. Your font will now be available to select under Custom Fonts in a drop-down menu.
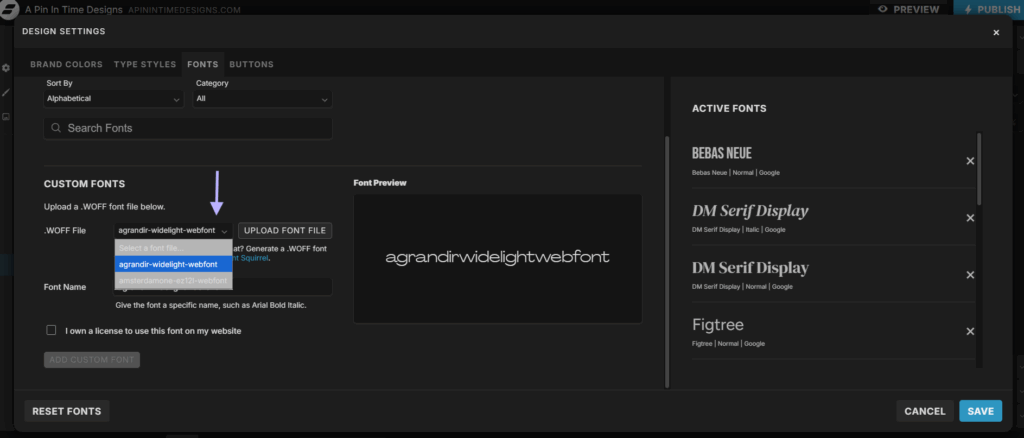
- Select your font from the drop-down menu, properly name it, and click on the text that says you own a license to use this font on your website (if it’s a free font or a font you purchased the correct license for)
- Click the add custom font button to add the font
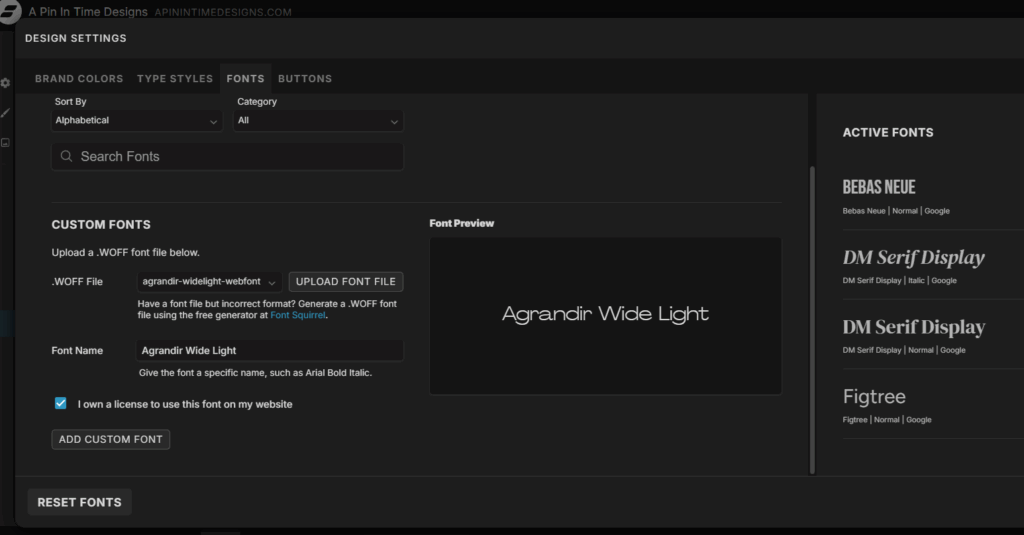
- Click on the save button in the bottom right-hand corner to save the newly added font
- Your font has been successfully added to your Showit dashboard!
The custom font is now available for use on any Showit website you create in your Showit account. Repeat the steps for every custom font you want to upload if you’re uploading multiple at once. If your custom font has different weight types under it (eg. italic, regular, semibold, bold versions), you’d need to upload each weight type individually.
Now you can go ahead and use the custom font in your Showit website and set it as a font for your headings or subheadings in the Type Styles tab in Design Settings.
📍Related Post – Blogging on Showit: How Showit Works With WordPress for Blogging
Website Font Use Best Practices
1️⃣ It’s best practice not to use more than 2 – 3 fonts on your website.
You can have one font for your headings, another for subtitles and button text and one for paragraph text. You can use different weights of the same font for both your headers and subheadings, or your subheadings and paragraphs.
There are different ways you can pair your fonts for your brand to achieve visual heirachy which is important for readability, but don’t use more than 2-3 fonts in general, so your website doesn’t look chaotic.
2️⃣ Don’t use script fonts for paragraph text or long lines of text
Script fonts are fonts that have a cursive or calligraphy style. They are great when used sparingly on a website as accent fonts, but they’re not as legible/easy to read compared to serif or sans serif fonts (eg. Monstserrat, Baskerville, etc.). So it’s not a good idea to use them for your paragraphs or any long lines of text, as this reduces readability, affecting the accessibility of your site.
3️⃣ Maintain proper contrast
Which of these would be easier for you to read? Light grey text on a white background? Or black text on a white background?
It’s definitely going to be the second option. Because black text has better contrast with a white background than light grey. This also applies to websites. You have to be sure that the font colour you use for text on your website makes the text easy to read against the background.

For example, if you make the background colour of a particular section a bright colour, like say light blue, you’d want to make your font a colour that shows up well on the light blue background. The same applies if you have text over a background image; make sure it’s easy to read. You can add an overlay over the background image and choose a bolder weight for the font.
The end goal is a website where people can easily read the information present on it. You can use tools like Contrast Checker to cross-check and be sure your font and background colours have a good contrast.
4️⃣ Use proper text tags
Make sure the text on your websites is properly tagged so search engines and screen readers know exactly which text is which and their functions. For example, headers can be tagged h1 – h6, paragraph text is tagged p, buttons and navigation text also have their tags, etc. If your text is improperly tagged, your site loses structure, and this can affect SEO and accessibility of your website.
In Showit, your texts are automatically tagged based on the type of text box/element you add to a page. But sometimes you might manually copy over or use a title text box for paragraph text after changing the font. That text box would then have the improper tag of a header, not a paragraph. You can easily change this tag to the correct one under text properties on the right-hand side of the dashboard.
📍New to Showit? Get one month free with code 17z676vn
I hope this post has made it clearer to you how to add custom fonts to your Showit website and also taught you more about proper font use for websites.
If you need help with your Showit website, I’m here for you. Whether you’re looking for a custom website build tailored specifically to your business, a ready-made DIY solution like my Showit templates, or need some updates done to your current Showit website, I can help. Check out my website design services.


