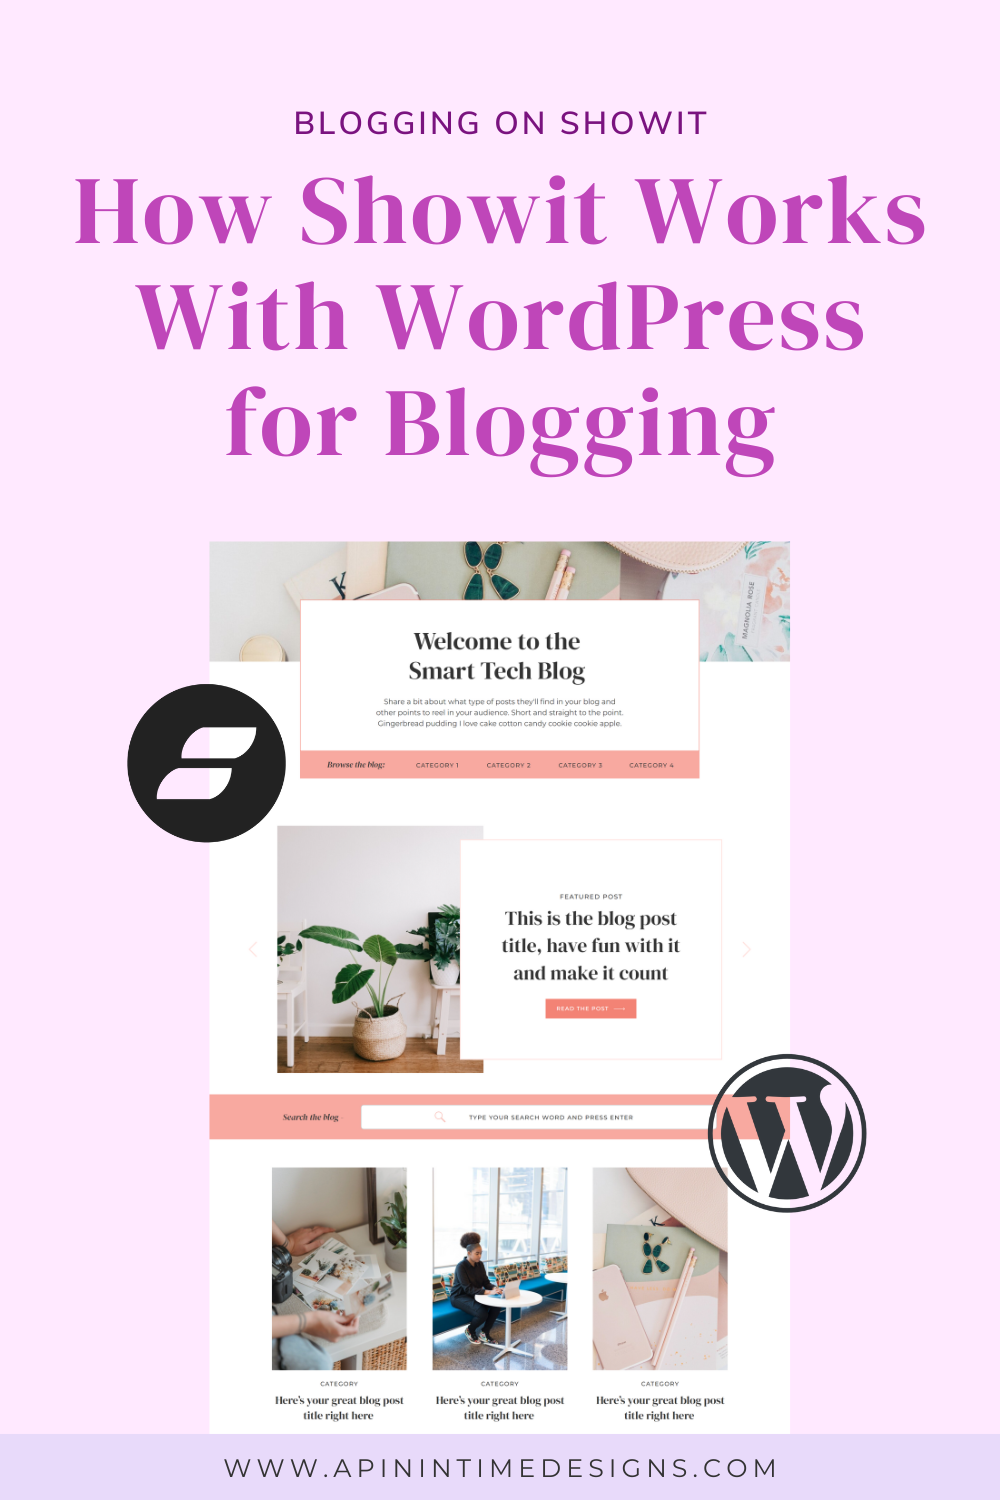
Blogging is a great way to drive traffic to your website and share your expertise as an online business owner. With Showit, you can add a blog to your website due to its integration with WordPress for blogging. So you get the best of both worlds; the drag-and-drop website-building capabilities of Showit + the blogging powerhouse of WordPress. This is especially great if you’ve used WordPress in the past and are worried about changing things up when you start using Showit.
But getting started with blogging on Showit might be a bit confusing if you don’t know how this integration and blogging on Showit works. In this blog post, I’m going to go over how Showit works with WordPress and how to set up your blog and start blogging.
New to Showit? Click here to get your first month free or use code “17z676vn” (referral link)
How Blogging Works With Showit
Showit integrates with WordPress for blogging, which means that Showit is in charge of the design aspect of your website meanwhile all your blogging activities take place in WordPress. The benefit of this is that you can design your blog pages exactly how you want to the Showit backend, which would be harder to do if you were only using WordPress for your website and aren’t tech savvy.
When you sign up for a Showit plan that includes a blog, a WordPress dashboard is created for you (after you request for it) and you can log in and create blog posts, pages and more. You’ll get a separate login page to get into the WordPress dashboard and the URL will be something like this – www.yourwebsite.com/wp-admin.
So where do I design my Showit Blog and where do I create my blog posts?
You’ll design how your blog & blog posts will look like in the Showit website builder. Keep in mind that anything design related is done in Showit and anything that relates to creating a blog post, comments, blog SEO or other blogging-related tasks is done in the WordPress dashboard.
So Showit = website and blog design, WordPress = blog posts, comments, plugins, blog SEO etc.
Not sure how to get to your WordPress dashboard to create your blog posts? No worries, just go to the URL which would look like yourwebsite.com/wp-admin and log in. There you’ll have the option to create blog posts, pages, change settings and (depending on which Showit plan you’re on) install any plugins you need.
It might seem like a pain to have to log into the WordPress dashboard to create blog posts versus just doing it all in one place, but having Showit & WordPress integration gives you more flexibility and control over your website. I’ll be going over the pages you need to design in Showit for your blog in this article as well so keep reading 😉.
Setting up your Showit blog
To get a blog added to your Showit website, you have to first put in a request for it as the Showit team would be the ones to create the WordPress dashboard that’ll be connected to your Showit website. You can request for this in these simple steps
- Log into your Showit account and go to your website
- Click on “Site Settings” in the top left corner
- If you haven’t connected your domain to your website, click on Edit next to Custom Domain and follow the instructions to connect your domain.
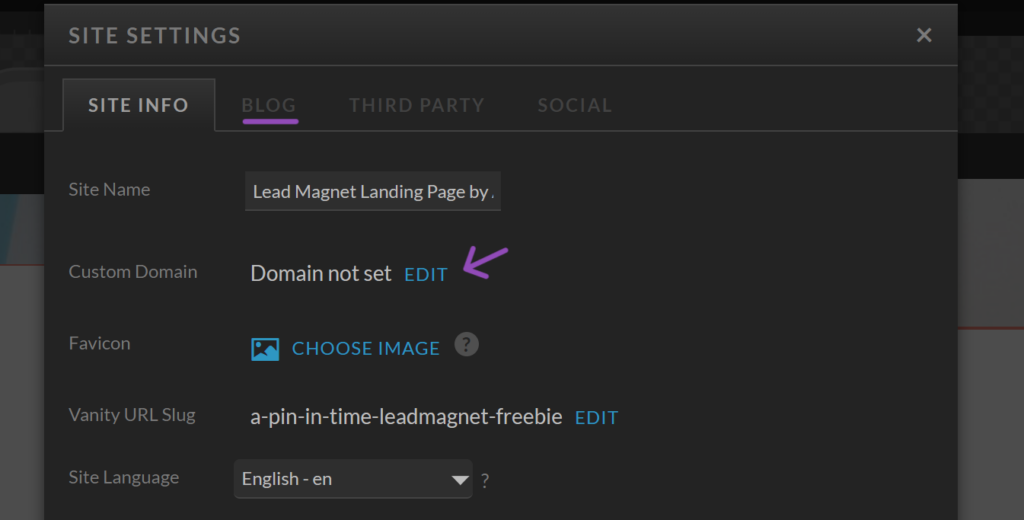
- After connecting your domain, you will then be asked whether you would like to set up your blog. Select “Yes, proceed to blog setup.”
- If you had already connected your domain before, on the site settings tab, click on Blog and click on Edit next to Blog Domain
- You’ll get the option to either set up a new blog or migrate an existing blog. Please note that you can only migrate an existing blog if you’re on the Showit Advanced Blog Plan
- After selecting your option, you’ll be asked to provide some information like your blog domain, phone no in case the Showit team needs to reach out to you etc.
- Showit will notify you by email when your WordPress dashboard has been set up and you’ll be able to log in to the dashboard and get started creating and publishing your blog posts 😊
If you had a blog on your former website, you might need to migrate it manually if you’re not on the Showit Advanced Plan. But if you are on the advanced plan, and you have a WordPress or Squarespace website, the Showit team will migrate your blog posts for you.
If you’re not on those platforms, then you’ll need to migrate your blog posts through other means like using a plugin or manual importation.
Now you have your WordPress dashboard, but that’s not all you need to fully have a blog on your Showit website and I’ll be going into what else you need in the next section.
Designing Your Showit Blog
Since Showit is in charge of the design of your website and blog, you need to design some specific pages in Showit in order for your blog & blog posts to be displayed properly on your live website. In your Showit dashboard, you’ll see a Page section and a Blog Templates section on the left side.
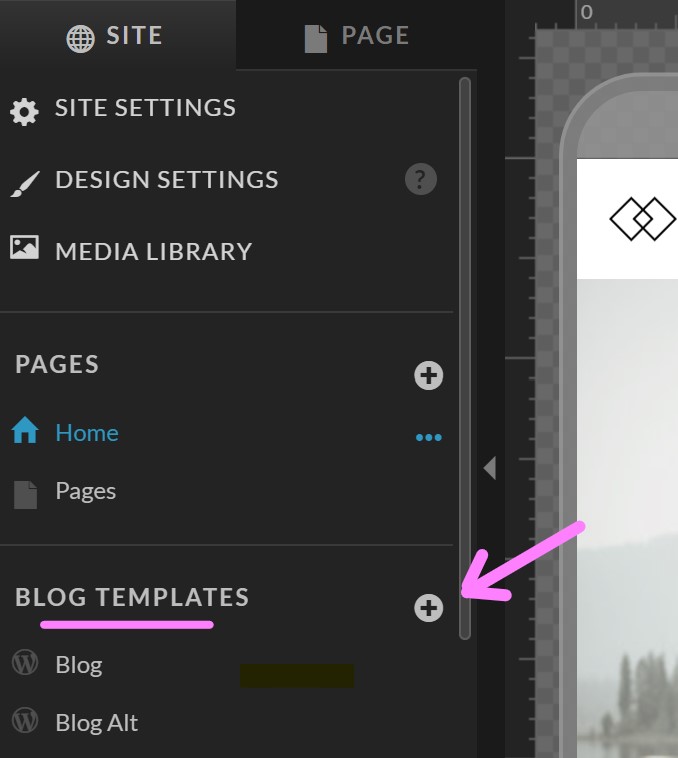
You need to design some pages under the Blog Templates section and make sure they’re properly connected using placeholders & other settings, so Showit can pull information from the WordPress backend and display it on your website.
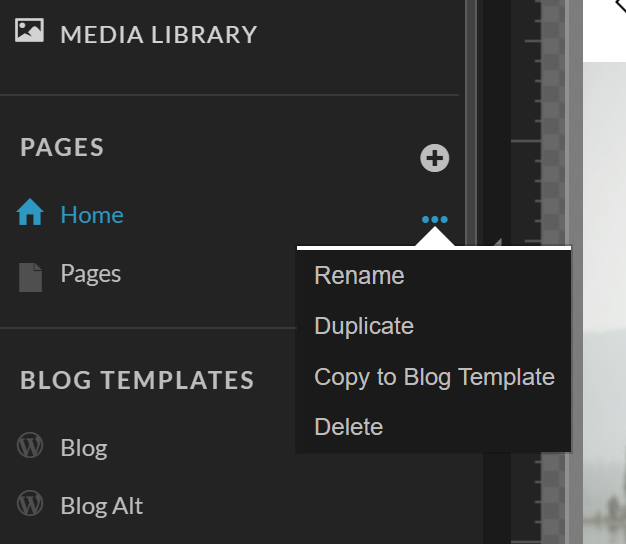
When you click on the plus icon, you have the option of adding a blank page or a new page from your Showit library to the blog templates section. You can also copy over one of your website pages to the blog template section if you don’t want to start designing from a blank page. Just click on the page you want to copy, click on the three dots beside the page and you’ll see an option to copy to blog template.
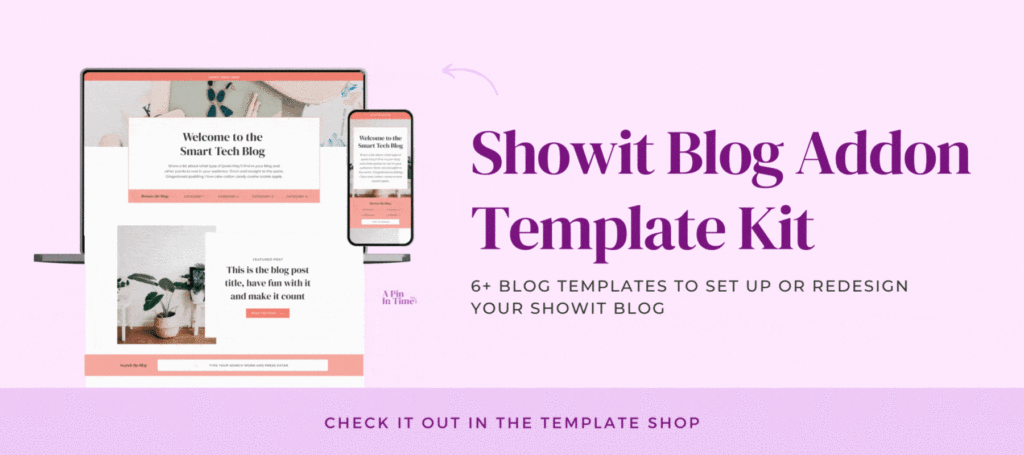
If you purchased a Showit template with blog templates or my Showit Blog Addon Kit which you can easily add to your Showit website, then you’d have these pages designed and properly set up so you won’t need to stress over designing & setting it all up. You can also get a designer to create these pages for you.
What are Placeholders?
Placeholders are basically settings that enable Showit to correctly populate content from WordPress to your live blog. You’d need to use placeholders for image and text elements so that the content you want in those spots will be populated on your live blog.
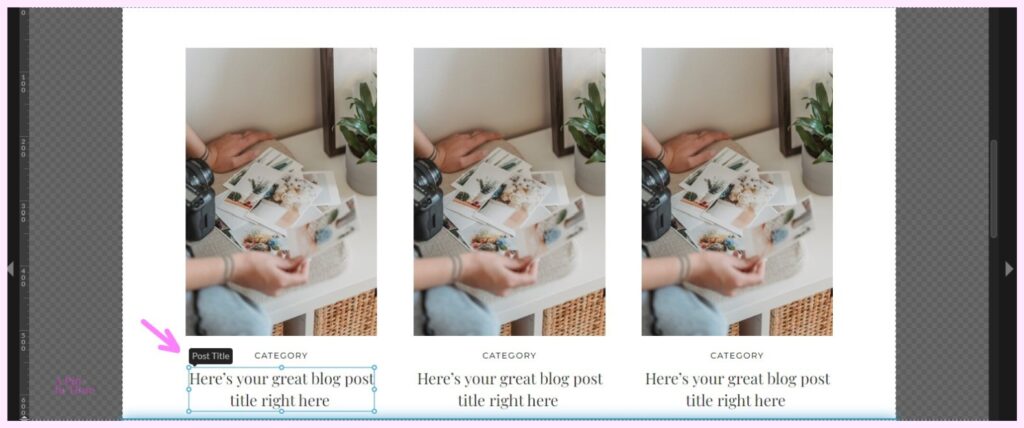
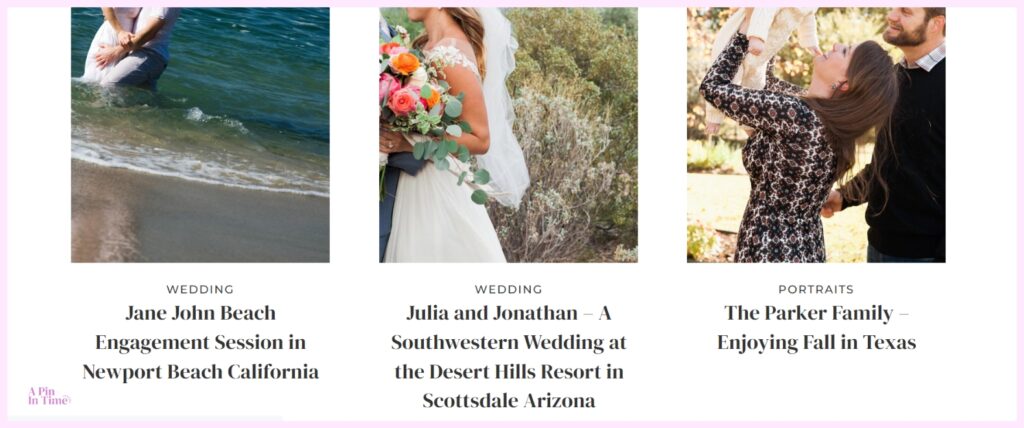
For example, in the first image below, the title is linked to the “Post Title” placeholder and the category text is linked to “Top Category” placeholder. These are placeholders that will let Showit know that the blog post title or category should be displayed in that spot on your blog and you can see how this shows up on the live blog in the second image.
PS: You won’t see a live preview of your blog (with the blog posts & content populated) in the Showit backend, but they will show up in the live version of your blog (if all placeholders & settings are correct).
To set a placeholder, click on the element you want to link, go to the page settings on the right-hand side, and under “Text Properties” you’ll see “Placeholders”, click on the dropdown and it’ll show you the different placeholders available and you can choose which you want.
If an element is linked to a placeholder, when selected it will show a little pop-up box above it with the name of the placeholder. You can learn more about placeholders here.
Here are the main blog pages you need to create;
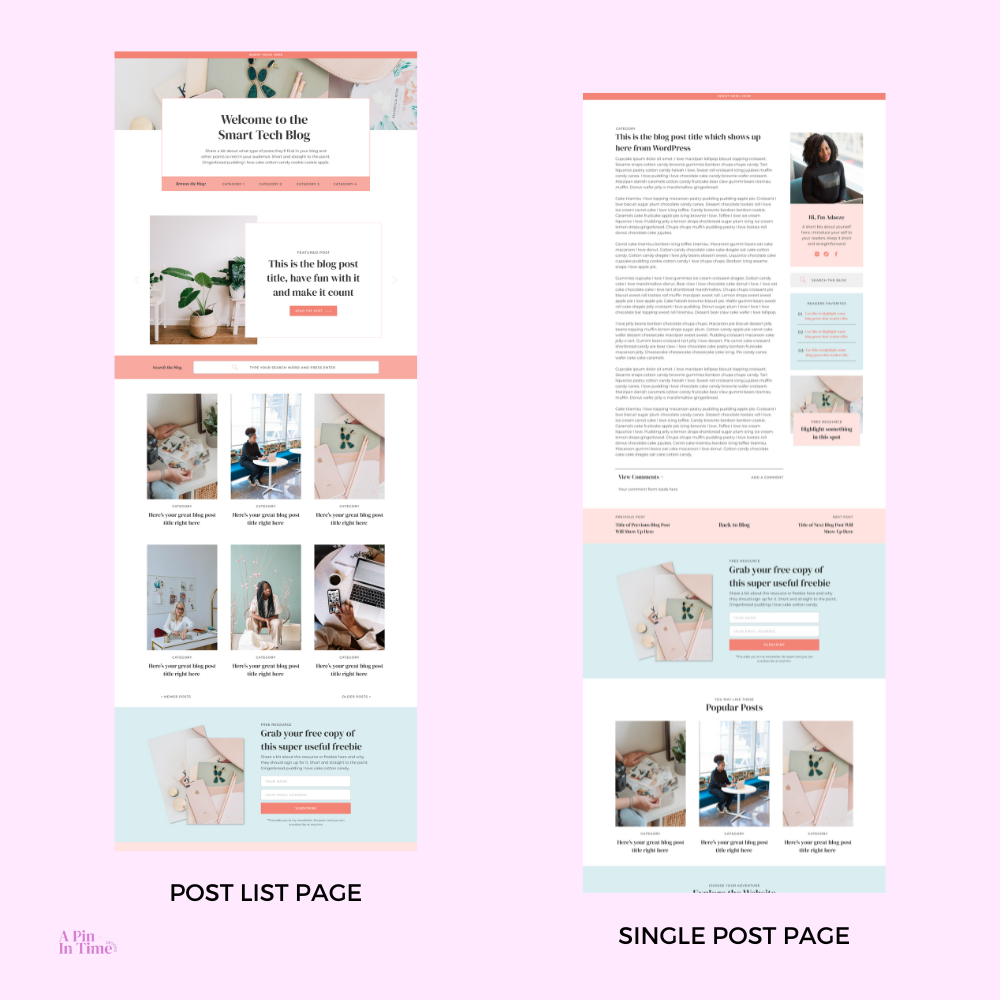
Post List (Default)
This is basically your blog’s homepage, where a list of your published blog posts will show up amongst other things. With Showit you have the creative freedom to design this exactly how you want, you’d need to create a section on this page that’s set up to be your blog feed. You can see an example of a post list page here, that page is a part of the templates you’ll get in the Showit Blog Addon Template Kit.
You can design any blog layout you want, like one blog post per row, or a side by side layout or alternating layout. Check out the Showit support hub for steps on how to go about designing this.
Be sure that your post list page is properly connected to the WordPress backend (asides from the placeholders) by clicking on the page and then on the right-hand corner, click on “Page Info” and under that click on WordPress Template and choose the correct option, which would be Post List (Default).
Single Post Page
This is the page design for your blog posts, which means all your blog posts will inherit this page design on your live website. You’ll need to use placeholders to link text or image elements on this page to the WordPress backend, so Showit can display your blog posts properly.
Commonly used placeholders for this page are Post Title, Post Top Category, Post Content, Post Comments etc. You can also have a sidebar on this page which you’ll design in Showit, this Showit help article covers how to create a sidebar.
Be sure that your single post page is properly connected to the WordPress backend, asides from the placeholders, by clicking on the page and then on the right-hand corner click on “Page Info” and under that click on WordPress Template and choose the correct option, which would be Single Post.
Would you rather get an expert to help you set up your Showit blog? I can help! A Showit VIP Day is great for this, be sure to check it out.
Category Page
This page is for showing all the blog posts under a particular category. On this page, you’d need to create a canvas on this page that’s set up to be your blog feed using placeholders and select the category option under Page Info > WordPress Template, so Showit knows this is the page design to use for the category pages.
So if someone clicks on a category in a blog post, they’re redirected to a category page with your design and the blog posts in that category.
PS: If you have a category navigation bar on your Post List page, you’d need to link these manually by going into your WordPress backend, getting the URL for each category and linking them individually to the text.
WordPress Page
If you plan to create pages in the WordPress backend, then you’d need to have a design for it. You can create a simple page with a title section and a post content section and connect it using placeholders. An example of the use of a WordPress page would be a privacy policy page or a terms and condition page, as it might be easier to create it in WordPress as a page than in Showit due to amount of text on such pages.
Writing & Publishing Your Blog Posts in WordPress
Now that you have your WordPress dashboard set up and your Showit blog pages designed, you can easily create and publish your amazing blog posts.
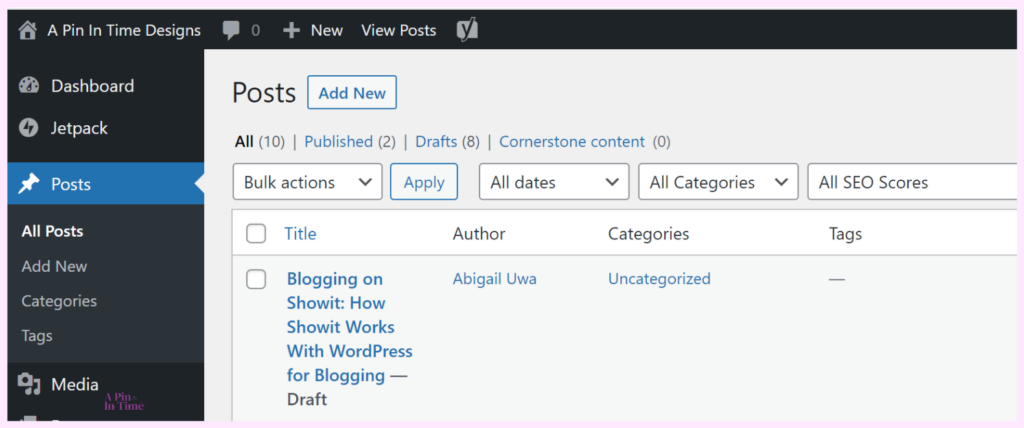
Log into your WordPress dashboard, on the left-hand toolbar click on “Posts”, this will open up the Posts page and you can click on “Add New” to start writing a new blog post. The Gutenberg editor will show up and you can get to work on your blog posts, adding in headings, images, quotes, setting a featured image and category and more.
You can also view a preview of your blog posts to see how they’ll look when published so you can make any changes you need to make on the Showit side if needed.
Keep in mind that WordPress inherits your design settings from Showit, so for fonts, it will inherit the font settings for your paragraph, headers, links, spacing etc. You can adjust the font sizes manually in the Gutenberg editor, use CSS on the Showit backend to make more customizations or install plugins like the Rise Plugin to get better control of your blog post font stylings and more.
Showit also comes with some preinstalled plugins like Yoast SEO which is great for SEO, etc. You’ll need to go to the Plugins page to see all the plugins, activate them and install the plugins you want (if you’re on the advanced blog plan).
When you’re done, publish your blog post and it will show up automatically on your blog. You’ll see that the placeholders have been replaced with your blog post content on your live blog and this will automatically duplicate the layout as you keep publishing blog posts.
And there you have it, you’re now blogging with Showit. It might seem a bit complicated but the Showit + WordPress integration gives you the best of both worlds and for the most part, if you use a Showit template with blog templates or have a designer design your blog pages, you most likely wouldn’t need to worry about the technical bits.
You can also learn more about blogging on Showit in the Showit support hub by clicking here, you’ll find many tutorials that cover basically everything you’ll need to know about blogging on Showit.
Ready to get started blogging with Showit?
Hopefully, you found this blog post helpful in better understanding how blogging works on Showit. Let me know if you have any questions in the comments and if you’re looking for a template for your Showit blog pages, check out the Showit Blog Addon Template Kit.
Need an expert to set up your Showit blog? I can help, my Showit VIP Day is perfect for this. In a day, I’ll design and set up the pages you need for your Showit blog so you don’t stress yourself over it 😊.
PIN THIS